2. Operation Quick Reference
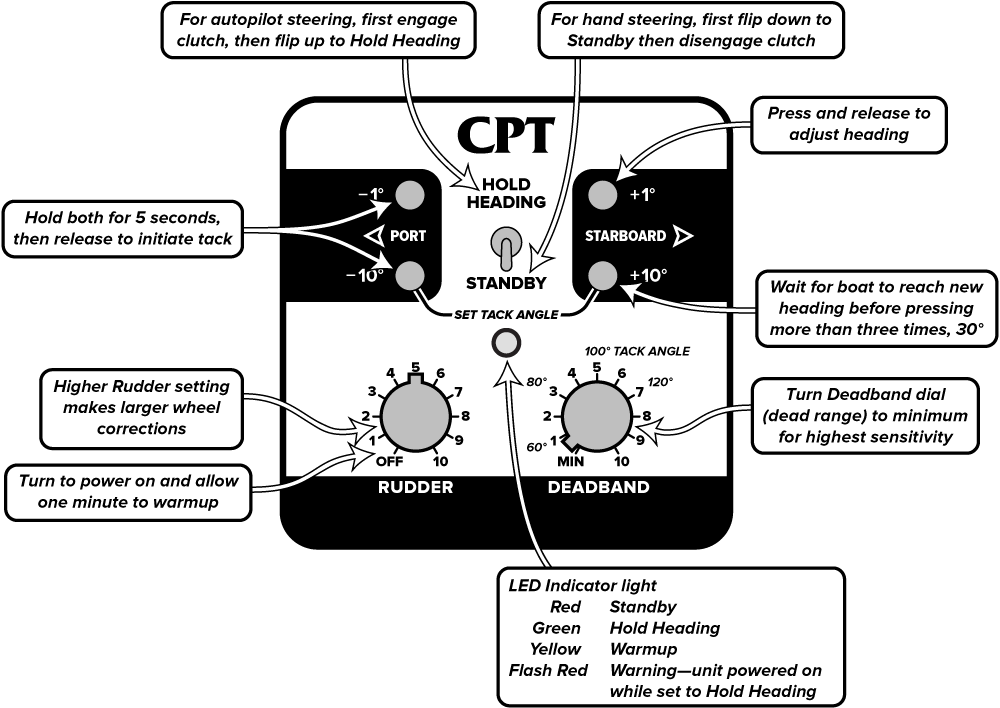
Turn power on with Rudder control. Wait at least 1 minute for pilot to warm up before using.

2.1. Autopilot Steering
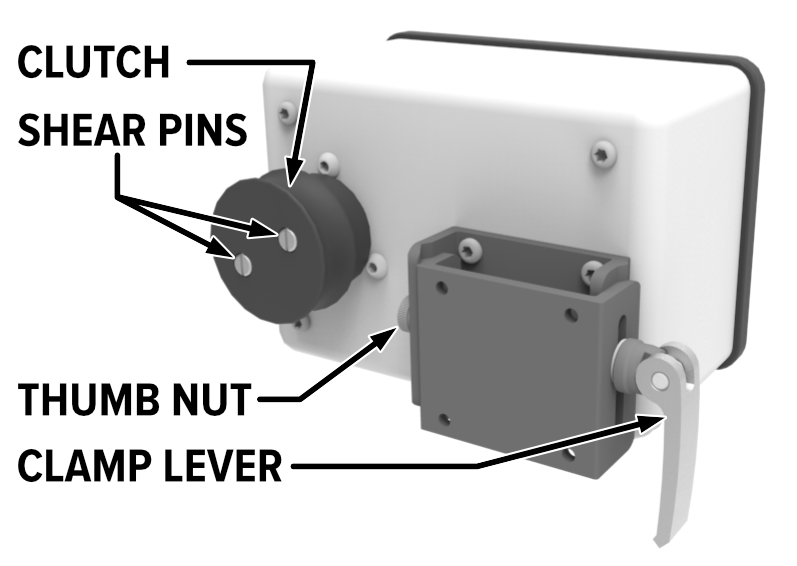
Hold boat on desired heading 30 seconds. Engage Clutch. Flip toggle-switch up to Hold Heading. Fine tune Rudder and Deadband as needed.
2.2. Hand Steering
Flip toggle-switch down to Standby and Disengage Clutch
In an emergency, the wheel can be forced to overpower the clutch and shear the shear-pins
2.3. Rudder Setting Control
Sets the autopilot Rudder Response.
Determines proportionally how far to turn wheel for heading corrections.
High settings turn boat’s rudder more; Low settings turn boat’s rudder less.
Turn to 5 at start, then increase or decrease as needed. Set as high as possible without causing over-steering.
2.4. Deadband Setting Control
Sets autopilot “Dead Range”
Determines sensitivity to vessel heading changes. Use to adjust for sea conditions.
Low settings hold boat to a tighter heading. Lowest setting allows approximately ±1° heading range.
High settings allow the boat to steer within a wider heading range. Setting of “5” allows approximately ±10° heading range.
Turn to minimum at start. Increase only after Rudder control is set and autopilot is steering adequately.
2.6. Tacking
Simultaneously hold down the 1° and 10° buttons for the direction you wish to tack. Keep both buttons pressed for five seconds. Release buttons to tack. Set Deadband low to keep the boat close to the new tack heading.
Flip to Standby and disengage clutch if stuck in irons or no wind to prevent wheel hitting rudder-stops
2.7. Change Tack Angle
Hold both 10° Port and 10° Starboard buttons down at the same time. Turn Deadband control to new tack angle and release buttons to set. Remember to return Deadband control to desired deadband setting afterwards.
Tack angles are approximate and will vary from boat to boat based on the magnetic environment. You will have to see which angle works best for your boat.
